Automatic cat food dispensers are an excellent solution for feeding your cat when you’re away from home, but choosing the right one can be confusing. Don’t worry, we’re here to help. In this guide, you’ll find a comprehensive selection of the most popular cat food dispensers, complete with their pros and cons and an objective analysis of each. This list of reviews is classified in automatic feeders with hopper for dry food, Rotating dish feeders for dry and wet food, and gravity feeders.
Are you Looking for a Special Selection?
If you don’t want to go through the list to find the best feeder for your cat you may want to check our selection of the best 15 auto feeders in the market, with unique features for different cats’ needs. And if you have a very mischiveous cat we have selected cat proof automatic feeders that will help you decide a suitable device for your feline.
Reviews of Automatic Dry Food Feeders with Hopper
Automatic dry food feeders with hoppers are designed to store and dispense food for several days. Our selection includes various types, such as smart Wi-Fi feeders, panel programmable units, timer programmable feeders, and selective automatic feeders.
When is an Automatic Feeder with Hopper Recommended?
An automatic feeder with a hopper is ideal if you need to feed your cat dry food and want to avoid frequent refills. These feeders can hold a substantial amount of kibble, lasting from several days to weeks. Let’s take a look at our top picks:
Smart Wi-Fi Cat Feeders Reviews
The following are dry food feeders with hopper that you can program on your phone through an App.
FEEDER ROBOT | 4.9 stars
The Feeder Robot can be programmed manually or using the free Whisker App. The App allows you to program up to 8 meals per day on each feeding schedule. You can create more than one feeding schedule if you want. The unit features a battery backup that ensures its operation for up to 24 hours in case of a power outage. The lid features a large light indicator of food level so you will see the food level at a glance if the level is low or critically low. This unit is suitable to feed multiple cats due to its high capacity. Check more details of this automatic feeder in the FULL REVIEW.
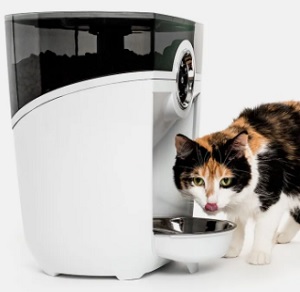
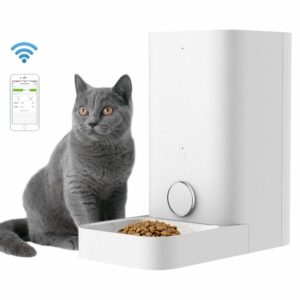
WOPET CAMERA 7L (Camera enabled) | 4.5 stars
The Wopet with camera with a high capacity of 7 lbs of dry food, allows you to feed your cat up to six meals per day automatically. You can manage this unit with the free Wopet App using your iPhone or Android. The Wopet App allows you to change feeding programming, customizing portions, enabling or disabling meals and checking on your feline friend whenever you need by activating a live-stream with the 720p HD built-in camera. Additionally, with the two-way audio camera you can talk to your cat or listen to it, one thing at a time. You can take also take pictures or make videos of your kitty. Find more details of the Wopet Camera in the FULL REVIEW.
PETSAFE SMART FEED (Semi-moist kibble too!) | 4.3 stars
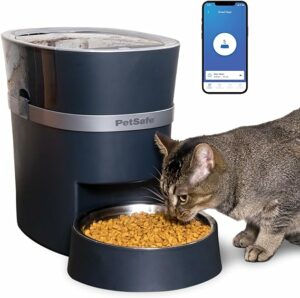
The PetSafe Smart Feed allows busy cat owners to have full control over the automatic feeder. By using the My SafePet App you can add meal times and customize the portions individually, according to your cat’s needs, all from your Smartphone, iPhone, iPad, or Android. You can feed your cat up to 12 times a day, with the schedule of your preference for your pet to eat. The PetSafe Smart Feed allows you to choose many different portions from 10g up to 4 cups of dry food at a time. Discover more interesting features of the PetSafe Smart Feed in the FULL REVIEW.
PETKIT MINI SMART FEEDER | 4.2 stars
Petkit Mini Smart feeder is the answer for cat owners whose cats are food-driven and need to eat small portions of food several times per day, up to 10. This way you can control not only the daily food intake to keep your cat at a healthy weight but also you can avoid speed eating which creates vomiting problems. The Petkit Mini protects the food from moisture with silica bags and features sealing silicone protection on the food gate. This ensures the food is fresh avoiding bacteria or fungus formation. Check more information of the Petkit Mini by visiting the FULL REVIEW.
DOGNESS Wi-Fi Smart Automatic Pet Feeder | 3.4 stars
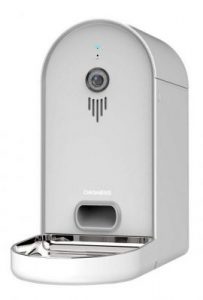
Dogness automatic Wi-Fi camera feeder allows you to program up to 6 meals per day and push extra manual feedings on demand from your phone. You can change the feeding settings from your phone at any time from anywhere.With its HD 265-degree camera you can watch, talk and listen to your cat, recording videos or taking pictures and storing them in your phone. The feeder features a 2-way talk, allowing you to talk and listen to your cat at the same time. Check the latest update of this unit in the FULL REVIEW.
Panel Programmable Automatic Feeders Reviews
Automatic feeders with hopper that you can program through a LCD panel. These feeders can’t be remotely controlled.
ONEISALL AUTOMATIC FEEDER FOR TWO CATS (Multi-Cat) | 4.6 stars
Oneisall is designed to feed two cats the same feeding schedule every day. You can feed each cat up to 6 meals per day, from a minimum of 8g to 12g up to one cup of dry food. What makes Oneisall unique is the position of the feeding bowls, in opposite directions, which allows cats to eat without seeing each other. It is much better for cats to feel they are alone when eating since they are solitary eaters in the wild. You can remove the food container to wash it and the feeding trays as well as the stainless steel bowls. For more details visit the FULL REVIEW.
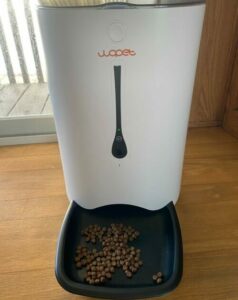
WUIPET ELEVATED AUTOMATIC PET FEEDER (Elevated) | Rating: 4.6 stars
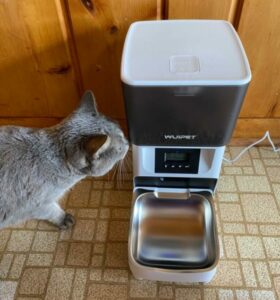
The Wuipet is an automatic feeder that dispenses food for your cat automatically according to the programmed feeding schedule. You can program up to 4 meals per day with a minimum of 14g of dry food and a maximum of 126g at a time. You choose the hour and minute you want each of the meals to be dispensed. A very unique feature of the Wuipet is the fact that you can elevate the feeder and the bowl to raise the food for your feline friend up to 3 inches to the rim. This is the only automatic feeder that offers this great feature. Elevating the food helps cats to prevent vomiting due to a better posture that lowers their body to a more vertical position. Learn more about the Wuipet on my FULL REVIEW.
PETLIBRO AIR AUTOMATIC PET FEEDER | 4.5 stars
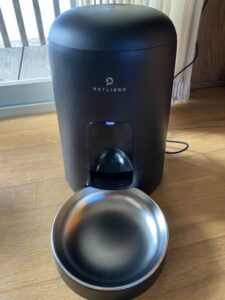
Petlibro Automatic Pet Feeder feeds your cat automatically up to 6 meals per day. Each meal can be programmed individually, with a specific feeding schedule of your preference. The meal sizes vary from a minimum portion (portion 1=1 full tablespoon) up to 16 portions at a time, according to your cat’s needs. The control panel is protected by a cover to prevent unwanted changes in the settings. The top lid seals the food securely with a cat-proof locking system that only human hands can open. This unit is great for cats on a diet or pets that eat their food too fast. Check more details in the FULL REVIEW.
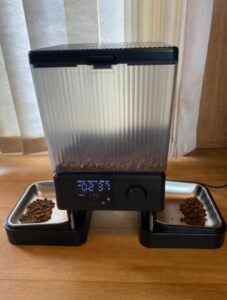
TSYMO AUTOMATIC CAT FEEDER | 4.5 stars
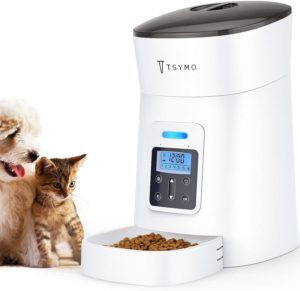
Tsymo pet feeder allows you to feed your cat up to 6 times per day. You can customize portions from four grams up to 200 grams at a time, ideal for cats on a diet. This unit has a unique anti-jam technology that reverses the gear if the food gets stuck during a rotation, so this way the stuck kibble gets released to continue the dispensing. This unit features a removable feeding tray and a sensor that stopped the dispensing in case of overloading. For best performance this unit works with kibble measuring up to 0.45 inches diameter. Visit more details of Tsymo feeder in the FULL REVIEW.
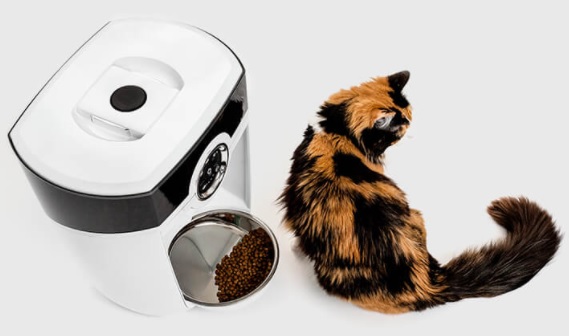
WOPET 7L AUTOMATIC PET FEEDER | 4.4 stars
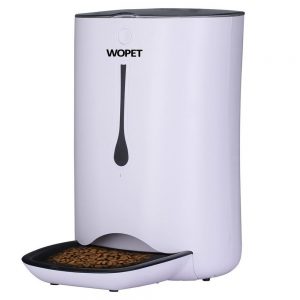
Wopet 7L automatic cat feeder allows you to feed your feline friend up to 4 times daily, within 24 hours. The feeding schedule is set for one day and this is repeated every day. You decide how much food you want to feed your cat in the morning, lunch, and dinner. Also, you choose what time your furry friend will eat his meals.You can back up power with 3D batteries to ensure its constant operation and to keep the settings in case the unit gets unplugged by accident or a power outage. Discover more features of this unit in the FULL REVIEW.
PETLIBRO AUTOMATIC PET FEEDER | 4.4 stars
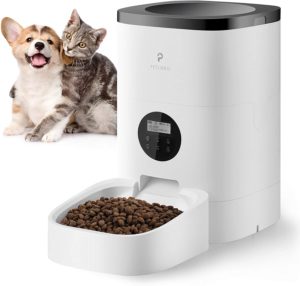
Petlibro is an automatic cat feeder that you can program to feed your cat from 1 to 4 meals per day. The setting up and programming of this unit are simple, the portions are accurate as well. The feeder features an airtight lid with a desiccant bag that absorbs moisture keeping the food fresh longer. The recommended kibble size for best performance is up to 1cm in diameter. The inside gear that rotates to dispense consists of flexible flaps that won’t create food jamming. For more details of the Petlibro visit the FULL REVIEW.
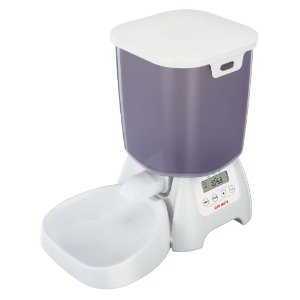
PETSAFE HEALTHY PET SIMPLY FEED | 4.3 stars
Petsafe Healthy Pet Simply Feed allows you to fully customize your pet feeding needs. With its special design, you can program a big breakfast and a small dinner, for example. The minimum amount to be dispensed is from 1/8 cup and up to 4 cups at a time. Additionally, you can program each meal to be dispensed whenever you need, up to 12 meals by day, without preset schedules or intervals between each meal. This automatic feeder is excellent to feed cats numerous times per day, smaller portions. This allows to control their weight without making them too hungry. Check more details of the Petsafe Healthy Pet in the FULL REVIEW.
ISEEBIZ 3L AUTOMATIC FEEDER | 4.3 stars
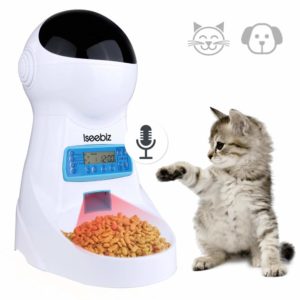
Iseebiz 3L automatic feeder allows you to feed your cat up to 4 meals per day. You can choose the amount and time for each meal, according to your feline friend’s needs. The minimum portion is 5gr so you can control your cat’s food intake in case you need to put your cat on a diet. The food hopper is airtight so it keeps the food dry longer. This is important if you feed your cat organic food or food without preservatives. See more details on the Iseebiz feeder in the FULL REVIEW.
CAT MATE C3000 AUTOMATIC DRY FOOD DISPENSER | 4.2 stars
This automatic feeder allows you to feed your pet if you are home or leave the backup settings when you are away. The Cat Mate C3000 can be programmed to feed up to 3 meals per day, each from a minimum of 1/3 Oz up to cups at a time. This unit works solely with batteries. The Cat Mate C3000 works well with 1/2” diameter kibble for better accuracy. Learn more details about the Cat Mate C3000 in our FULL REVIEW.
ARF PETS AUTOMATIC PET FEEDER | 4.1 stars
Arf Pets Automatic Pet Feeder dispenses up to 4 meals per day, customizing the schedule for your cat. You can choose a portion from 2 tbsp up to 1 cup of dry food at a time. Additionally, you can record a personal message calling your pet to eat. The lid features a strong magnet that keeps the lid shut, protecting the food and the control panel. This provides a good sealing to keep the food fresh. The food hopper and tray are removable for easy cleaning as well. Arf Pets automatic pet feeder works well with round spherical kibble and for cats that are not food-driven. Check more details in the FULL REVIEW.
Programmable Automatic Feeder with Timer
This particular model is programmed using a unique digital timer with advance programming features.
CSF-3 “SUPER FEEDER” | 4.2 Stars
The CSF-3 Super Feeder is a very versatile automatic cat feeder. With the digital timer you can program this unit in advance the days or the week you want it to operate. You can also mount this unit on the wall if you have a very mischievous cat. The Super Feeder has perfect accuracy in portions when using round, spherical 1/4” diameter kibble. However, it also works well with bigger kibble size, up to 1/2″ diameter. You can also purchase the Super Feeder digital as a combo with an extra 24-cup food hopper. This combo is called the CSF-3XL Super Feeder. The Super Feeder has been in the market for over a decade proving its reliability. You can adapt this feeder to use it with stainless steel bowl as well. Check its FULL REVIEW.
Selective Feeders Automatic Dry Food Reviews
Selective automatic feeders stop cats from accessing the other cat’s food while granting access only the assigned cat.
PORTIONPRO RX AUTOMATIC FEEDER | 3.7 Stars
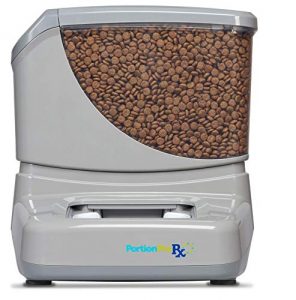
PortionPRO RX is a selective automatic pet feeder that allows you to feed your cat a prescription diet while keeping the other pets in the household away from the food. The RFID technology triggers a motorized food sliding door that protects the food, letting only the cat you want to eat have access to the food and shutting down when the unassigned pet is nearby. The assigned cat wears a collar tag to trigger the mechanism. The feeder also works in an open mode in which case the allowed cat doesn’t need to wear a tag, but the unassigned pets do. This automatic feeder is perfect for cats eating RX diets, stop food conflicts, pets on a diet, and stop fast eating. Check more details on how this unit works in the FULL REVIEW.
WIRELESS WHISKERS AUTOMATIC PET FEEDER | 3.4 stars
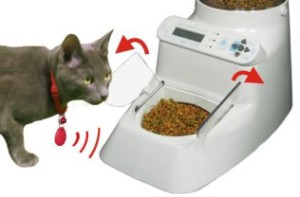
Wireless Whiskers automatic pet feeder gives you a selective solution to your multi-pet feeding. This feeder works with a wireless tag that is attached to your cat’s collar and it activates the feeder to open when a daily portion is available in your pet’s diet. This autodiet automatic feeder has the ability to measure, set and control the daily food intake for one, two, or more cats or dogs (up to 8 pets) individually. It feeds all your pets preventing food conflicts. Learn more features of this feeder in the FULL REVIEW.
Dish Automatic Feeders Dry & Wet Food
The following list has been sub-classified according to their features, such as panel programmable, selective feeders, smart Wi-Fi, and motion sensor. If you need to find the perfect unit without going through a list, we have selected the best 7 automatic wet food feeder reviews to make a selection easier for you.
When is it Recommended a Dish Automatic Feeder?
These are usually rotating style of flip-lid and they are suitable to feed cats dry or wet food. These type of units are recommended for cat owners who are willing to refill the feeding tray or pour food into the feeder every day or every two days. Some of them feature ice packs to keep the food fresh for longer.
CAT MATE C500 AUTOMATIC FEEDER | 4.3 stars
Cat Mate C500 is an automatic feeder that dispenses dry or wet food and it serves up to 5 meals, one at present while 4 can be scheduled. The unit features ice packs to keep the food fresh for longer, especially to keep canned food fresh. The Cat Mate C500 features a digital timer which gives more accurate feeding times. The Cat Mate C500 is easy to clean, the top lid and feeding tray are removable, and it’s dishwasher safe. This automatic feeder works with 3 AAA alkaline batteries (not included). For more details check our FULL REVIEW.
PETSAFE 5 MEAL ELECTRONIC PET FEEDER | 4.1 stars
This automatic feeder serves up to 5 meals by day. The first tray has a cover to protect the food and it is served at present time. This is a unique device because it is a dish feeder with a digital timer, which gives you accuracy in times. The digital timer allows you to set feeding schedule with one hour between each meal. Discover more features of the PetSafe 5-Meal in the FULL REVIEW.
PETSAFE DIGITAL TWO-MEAL FOOD DISPENSER | 4.1 stars
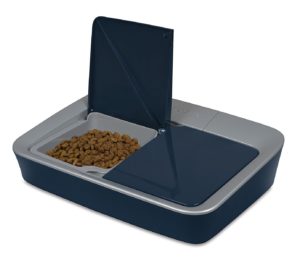
PetSafe Digital 2-Meal Feeder allows you to feed your cat dry or wet food with the peace of mind your pet won’t get access to the next meal. The design is secure and features two lids that are not possible to open without pressing a button. If you have a cat that has managed to open all the previous feeders this is a suitable unit for you. With the PetSafe Two-Meal digital timer you can program each lid separately to feed for example lunch and dinner. You can also program the meals in advance from the present time, up to 4 days. Learn more about the PetSfe Two Meal in the FULL REVIEW.
PETSAFE 2-MEAL AUTOMATIC PET FEEDER | 4.1 stars
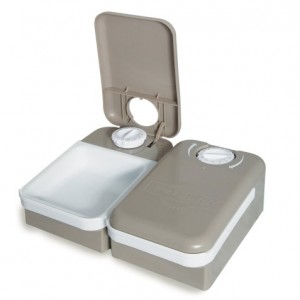
Petsafe 2-meal allows you to feed your pet two meals within 24 hours or one meal every 24 hours. The analog timer allows you to program the unit up to 48 hours length in advance. The minimum interval between each meal is 2 hours. Each tray has 1.5 cups capacity to hold dry food. The Petsafe 2-meal is designed to feed dry food but some customers have managed to use it with wet food, freezing the food before placing it on the trays. The Petsafe 2-meal is easy to use, you have to fill the compartments with food and set the meal time on each tray, according to the times you want your cat to eat. The unit uses 1 AA battery that lasts approximately one year. More information in the FULL REVIEW.
CAT MATE C300 AUTOMATIC PET FEEDER | 4 stars
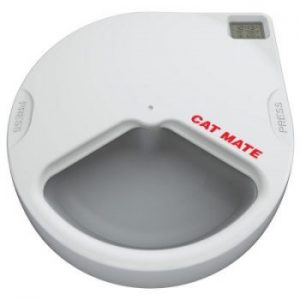
With Cat Mate C300 you can feed your cat up to 3 times a day, dry or wet food. It comes with an ice pack that keeps the food fresh for longer and it features a digital timer for easy programming. The first meal is unlocked by default for your cat to eat right away. The two other meals can be programmed to be dispensed either two times per day or one time per day for two days. The feeder has a good capacity in each food compartment of ¾ lbs that is enough to keep your kitty satisfied. This unit can be attached to a wooden platform to secure the device in case you have a mischievous cat that will play with the feeder. Check our FULL REVIEW to discover more features of this feeder.
QPETS 6-MEAL LCD AUTOMATIC CAT FEEDER (voice recording) | 3.7 stars
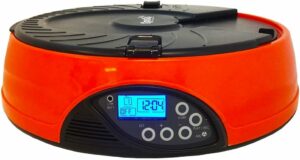
This dish food dispenser has a microphone to record a personal message for your cat. Additionally, it features a low battery indicator that allows you to make sure your feeder will be powered before you leave. This unit has programmable feeding sequences of up to 6 meals per day. You can find more details of this feeder in the FULL REVIEW.
Selective Feeders for Wet & Dry Food Reviews
These feeders allow you to feed wet or dry food to a specific cat while keep the rest away from the food.
SUREFEED MICROCHIP PET FEEDER | 4.5 stars
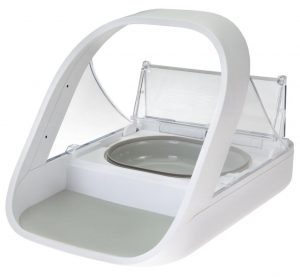
SureFeed Microchip is a microchip selective feeder that allows cats to eat by recognizing their microchip implant’s ID or the ID in the collar tag. Sensors located on the hoop recognize the ID code and opens a lid for the authorized cat to eat. The unit works with RFID technology and can store up to 32 different identities, allowing more than one cat to eat from the feeder. SureFeed is compatible with any microchip code worldwide. This RFID selective feeder is excellent to feed cats with special dietary needs or feeding cats that don’t get to eat because of other pets. SureFeed microchip stops cat food conflicts, feeds prescription RX diets, helps to isolate ill cats, and more. Check our FULL REVIEW for more details.
Smart Wi-Fi Rotating Feeders Reviews
Dish type automatic feeders that you can program and manage on your phone using an App.
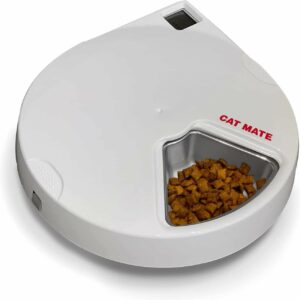
CATIT PIXI 6-MEAL AUTOMATIC FEEDER | 4.3 stars
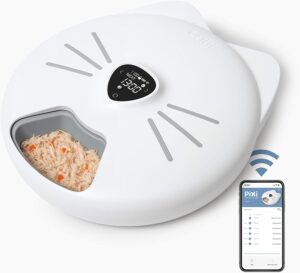
Catit Pixi 6-meals allows you to feed your cat wet and dry food, ideal for a mixed diet. The feeder comes with a couple of large ice packs to keep the food fresh longer. You can feed your cat 6 times per day, 5 meals are programmable, because meal #1 is served at the present moment since the tray is uncovered. You enjoy flexibility when feeding your pet because you can set up a feeding schedule on your phone using the Pixi App. You can program meals with minute intervals to hours. You can feed your cat once a day for 6 days or 6 times per day if you need to. Check here for a FULL REVIEW.
Motion Sensor Wet Food Feeder Reviews
Pet food dispensers that allow you feed your cat wet or dry food, and that open through motion sensors. The cat doesn’t need to use collar tag or anything, this is basically a feeder to protect the food against the elements.
SUREFEED SEALED PET BOWL | 4 stars
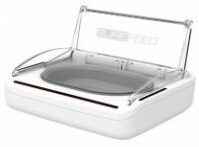
The SureFeed Sealed Pet Bowl keeps your cat’s food fresh and protects it from insects. The bowl features infrared sensors that detect your pet’s movements and opens a lid, uncovering the food for your cat to eat. The sensor is not selective, this means any pet nearby the feeder will be able to activate the sensor and eat from the bowl. The feeder features special rubber on the edge of the bowl that when in contact with the lid, it gets sealed reducing food smell in the house. Learn more features about this wet food feeder in the FULL REVIEW.
Gravity Cat Food Dispensers
This is a comprehensive list that features different types of gravity feeders according to specific needs.
When is it Recommended Using Gravity Cat Food Dispensers?
These are suitable for people who don’t need to program a feeder, they just need a solution to stop pouring kibble into a bowl every day. This means gravity feeders are free feeding devices that don’t control the cat’s food intake.
BERGAN PET FEEDER TRAVEL | 4.5 stars
Bergan Pet Feeder Travel has a special design to feed your pet when you are traveling. With this unique system, you can feed your cat and continue your travel, that easily. The feeder features a snap-on lid and a rotating bowl that you can swing open to feed your cat and swing it shut when your pet is done eating. The unit keeps the food fresh and free of contamination. With a handle on the lid, the feeder is easy to carry without spilling food and you can control how much the bowl gets filled by how far you open the bowl. Check more details of this gravity feeder in the FULL REVIEW.
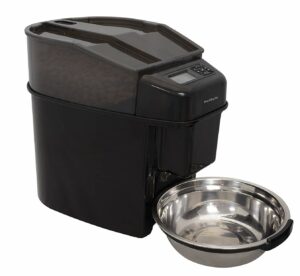
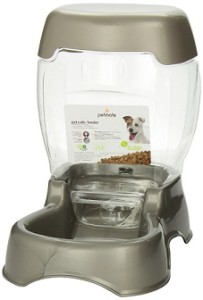
PETSAFE FEEDER WITH STAINLESS STEEL BOWL | 4 stars
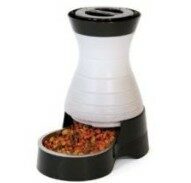
This cat food dispenser has a gravity food system and also a dishwasher safe removable stainless steel bowl. This unit is a good solution if you want to forget about pouring food every day into your cat’s bowl. This feeder is suitable for cats with normal food intake, and it works well for two cats. Discover more features and pros and cons of this gravity feeder in the FULL REVIEW.
BERGAN PETITE GOURMET FEEDER & WATERER | 4 stars
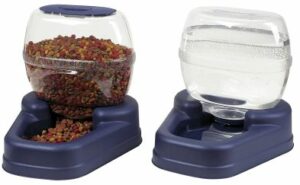
These feeder and waterer are very sturdy units and this is a good advantage because they offer good stability. The Bergan Petite feeder works through gravity, which means it does not work with timers so you cannot set a feeding schedule for your pet. This feeder & waterer combo is ideal to free feeding two cats for several days. Learn more details of this duo in the FULL REVIEW.
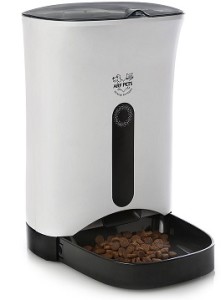
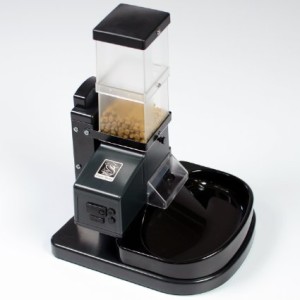
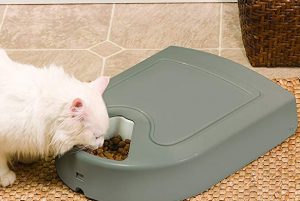
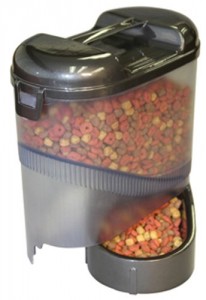
PETMATE PET CAFE FEEDER | 3.9 stars
Petmate Café feeder works by gravity so the food stays available all day for your cat to eat. The feeder has a clear transparent food hopper that makes it easy to see the food level at a glance. The unit has a nice and simple design that fits most kitchen styles. The feeder’s bottle is made from PET plastic, making it environmentally sustainable. The feeder can be lifted easily with recessed areas. The lid and base are dishwasher safe. Petmate Cafe Pet Feeder is suitable for an indoor or outdoor cat, requiring occasional supervision to keep the gravity system flowing. More details in the FULL REVIEW.
This website was created to help you on the adventure of feeding automatically your loved pet. We hope our content is useful for you and if so, we are very happy to have accomplished our goal!
Comments or suggestions are very welcome!
Some content contains affiliate links or samples for reviews; I may receive compensation. Learn more
Very informative article, might just have to invest in one of those gadgets for our two. They seem permanently hungry at the moment.
If you have two felines and they can eat together, I recommend the Automatic Feeder Combo CSF-3XL 1.8 Gal. Just adapt the nozzle with two dispensing directions and put two bowls. It is a perfect solution because it can be set with several times a day of dispensing (up to 8) so you can feed them both at the same time. You can set the time for feeding them too, making your own schedule :-)
The Le Bistro it seems has been “enhanced” since the last review on here. There is a flap which will prevent a cat from reaching up the chute to the food. Also the top and hopper seem to be much more securely fastened to the base than previous models.
As for portion control yes it does over feed with small pellets but only by about 2 tablespoons. For the price difference I think I can live with that and just feed my cat fewer times a day.
Thank you very much for your contribution Pilotman. The nozzle problem was very usual in lots of customers and it is good to know they have fixed that problem. My ultimate goal is to help people not waste money in something it won`t work for them. About portion problems, if your cat is not overweight or diabetic, it makes totally sense what you say, especially if your cat is active and can eat little extra food from the feeder. I will begin to investigate Le Bistro again to make a new review. Thanks again for your input!
I need to feed one cat often and not let the others access his food. Since I’m away at work all day, I was wondering if there was a feeder that would open only when that cat went to it, via a signal from a collar, for example, and would close after he leaves. They have this kind of thing for cows in barns where they can move around. Have you ever seen a feeder like this for cats?
Hello Nora, thank you for your question. Soon I will add reviews for this type of situations because they happen very often. So far I have investigated one feeding system that works with collar, but it has horrible reviews so I would not even mention it to you. But I have seen customers with your same problem finding solutions with electromagnetic cat flaps which allows you to separate the cat that does not eat from the others. You will see a page with several brands here: https://www.amazon.com/s/ref=nb_sb_noss?url=search-alias%3Dpets&field-keywords=animate%20electromagnetic%20cat%20door
So far is the best solution for this problem. I hope my answer helps you. Good luck!
Update: an excellent automatic pet feeder that resolve this problem is the “Wireless whiskers” that works with ID in the cats collar and opens only after recognizing one particular cat from the other. You can find the link here of this feeder.
Hi,
Your reviews of the Cat Mate products are very helpful, but before I try the Cat Mate auto feeder, do you have any recommendations for an even better product for wet food? My two cats are strictly wet food eaters, and I have no idea if my they would be aggressive about raiding and disabling the feeder; I think they are more likely to be frightened by whatever noise it makes. In any case, I’d plan on buying two so they wouldn’t compete for the food once the tray opens. Are there any higher rated feeders that also have some system for keeping wet food fresh?
Thanks!
Hello Joe, thanks for your question. Before an answer, how many times do you feed your cats by day? and the other question is: what is the length of period do you want to feed your cats? (example, 2 times a day within 10 hours or 3 times a day within 24 hours, etc.) Thanks!
I have one cat that needs some treats through the night ,not a feed ,so do you know of any cat dispensers that just give out a small handful of dry food rather than 1/4 or 1/3 of a cup
You can use a treat toy dispenser and put just a few of treats so this way your cat can eat them at night. You can find the link in here: https://www.catfooddispensersreviews.com/cat-treat-dispensers-toys-reviews/
Another option is the Super Feeder which has digital timer which allows you to program a minimum setting of 1 second (length of time the feeder releasing food) which is a fraction of a cup.
Hope I could help you and good luck!
If a cat has diabetes he or she shouldn’t be eating dried food! Dried food has far too much grain: this is what probably caused the diabetes in the first place.
Thank you for your comment John. If you notice all the automatic feeders I recommend for cats with diabetes are the one for feeding moist food and not for dry food.
Anyway, to figure out what is the best type of food (if dry or moist food) is completely decision of the cat owner based in their searching about this topic. But if they decide to feed dry food their diabetic cats whether because availability of dry cat food for diabetic cats or any other reason, they will find useful information in my website.
Thank you again for your input, I am sure cat owners will appreciate it.
Hi Lorena
Just came across your site when looking to find a dispenser our Burmese cats can’t break into while we aren’t there. One is what you would call a locksmith cat – not only does he knock out the flap on the 6-MEAL LCD AUTOMATIC CAT FEEDER ★★★ but he can somehow remove the whole cover and access the food below. He is also a guts who will push our other cat out of the way to eat his food too.
What would you recommend for two cats, where one is very sneaky, determined and obsessed with food?
Thanks in advance!
Hello Lara, thank you for your question. It is hard to feed two cats at once when one of them is obsessed with food because usually the one that is food driven eats the other cat’s food before the docile one finish its meal. My suggestion is to use an automatic pet feeder especially designed to resolve this problem. It is the “Wireless Whiskers” automatic feeder which works with wireless ID in the cat collar and allows you to feed your 2 pets individually without problems because it opens only when it recognizes each pet. You can find in this link this great feeder.
I hope I could help you!
You need to review Petfeedster!
I bought a Petfeedster in April 2011 and have used it everyday since. It can be used for cats or dogs; we have a cat. It is an ingenious, well-designed device that is versatile, efficient, and effective. It has been well worth every penny of the $199 I paid two years ago. It now sells directly from the manufacturer at $249. The flex feeder assembly has worn out after two years; I ordered it online for only $25 plus S&H.
We can sleep in or stay out late without worrying about Tiger going hungry. We can go out of town for a few days and have a neighborhood petsitter come change the catbox and play with Tiger at his/her convenience without worrying about Tiger getting fed twice a day at inconvenient times.
It has a battery-powered back up system to prevent loss of function in a power outage. It can be set up to feed as many as 5 times per day using dry food from ⅛” to ¾” size pieces.
I will. Thank you very much for your input. Our readers will really appreciate this new review!
Hello Lorena
We noticed that Wireless Whiskers had disappeared from the 2013 Reviews. We had some technical issues with this listing disappearing on Amazon, and maybe you thought it was no longer available. This problem has been resolved and I hope we can be added back to the 2013 review, as you did an excellent job describing our product for your subscribers. Thank you.
Thanks for your contact Steve. Exactly, I thought the product was not available anymore. I will put the review back.
Thank you.
Steve,
Thank you for noticing that your product was not here. AS owners we have no way of knowing every product out there and noticing that one is missing that is a good choice for us to use. I like that the company is watching what is being said about the product and if anything is being said.
The product is on the list if you look carefully.
What do you recommend as a wet food feeder for my cat? I want to feed him wet food twice through the day when I’m gone about four hours apart. I want to make sure that it has some type of a cooling feature on it. Is the cat mate c20 The only one you know of that offers the ice pack feature? Have you heard anything from other people about how effective this is like keeping the food fresh?
Thank you!
Hello Angela, thanks for your question. If you want to feed your cat twice a day moist food with 4 hours apart the C20 is a good solution because each lid has its own timer and you can set up the times at anytime you want. Plus, the ice packs lose the coolness from 6 to 10 hours, depending on the climate you live. A good tip to keep the moist food even fresher is to place it frozen on the trays plus the ice packs underneath the feeder.
The other alternative is the C50 that has 5-meal-capacity, one of them to be eaten at present time but is not practical since the ice packs lose the coolness in about the same time between 6-10 hours so it would not be worth to fill the 5 trays with moist food. This solution is more practical for people that feed the pet more than 2 times a day wet food.
Note that cats can smell the food from these feeders, especially wet food so you have to make sure your cat is not so obsessed with food, it is a “good boy or girl”. Cats are very unpredictable when it comes to feed them automatically.
Hope I could help you!
Hi, I’m wondering if the C50 will work with wet food only for two days in a row if it is frozen first? My cat needs to be fed wet food only twice a day, but it would be easier if my pet sitter only had to come every other day. Just wondering if the food will still be okay on the second day if it starts out frozen. If not, do you have another recommendation for a wet-food only cat? Thanks.
Hello MG, thanks for your question. How long the ice packs last and how long the frozen food lasts will depend of the weather where you live and the room temperature. If we consider an average temperature room (approx. 70°F) and if you use canned wet food and you freeze it before and place it on the trays without spreading it, the 3rd meal might still be OK for your pet consumption. However, I am not sure about the 4th one. Consider that the ice packs melt within 4 to 10 hours depending on the weather, still keeping the coolness though.
If you don’t want to waste the money buying something it might not work, maybe it is a good idea to do a test first. If you have ice packs on your freezer use them underneath any plastic container with a lid. Place the wet food there and cover it with the lid and wait 48 hours and then check the condition of the food. That way you will make sure the device will work fine, according to what you want.
I hope I could help you and good luck!
There seems to be a large price difference between these products.
The CSF Super Feeder seems like the best bet in terms of reliability.
Yet, at less than 1/2 the price is the PetMate LeBistro design any better these days?
Edit – Sorry, I did some further reading on Petsmart. Recent reviews seem to continue to blast the LeBistro feeder for the poor trap door design and improper portion release.
Hello Marc, thanks for your question. Yes, the CSF-3 Super Feeder is one of the most reliable feeders. And the Petmate Le Bistro has some issues like the one you just described. I would recommend that device only if you want to feed several cats where the daily dispensing amount is not a big issue and where none of the cats are obsessed with food.
Hi. Thank you for your reviews and information. It is very interesting.
I have a single indoor cat that is fed dry food during the day (left out for her to eat when ever she wants) and a wet meal once a night, around 8pm.
What automatic feeder would you recommend for us going on vacation for up to 7 days? Is there any product out there that automatically keeps the wet food cold and fresh and simply pushes it out at a set time? Of course if it could also push out dry food once a day (say in the morning) and even cover the lid of the old food would be great! We have ant problems here being in the tropics too. Thank you
Hello Fernando, thanks for your question. If you are in the tropic climate I am afraid that there is not any device that can keep wet food fresh for 7 days. Any ice pack melts and loses the coolness within 6-10 hours depending on the climate. For wet food I would recommend you the Cat Mate C20 but this device would feed your cat 2 and maybe 3 of the 7 days. And you have to use it with the follow instructions: Putting frozen canned wet food without spreading it on the tray and with the ice packs of the Cat Mate C20. And this would work as I said, only for 2 or 3 days at the most.
Regard dry food I can suggest you the Super Feeder which can be programmed to dispense food according to the schedule you need for your cat and it is a very reliable feeder. The Super Feeder can be programmed up to 7 days as well.
So my suggestion is to feed your cat dry and wet food the first 2 days and then only dry food. Or only dry food the whole time. It is also important that you ask somebody to check on your cat after a couple of days because 7 days alone it is too long for leaving a cat alone at home.
I hope I could help you and good luck Fernando.
I am the owner of one very hungry cat who likes to make her point of ‘I want food’ very early in the morning (and pretty much all throughout the day). She is on a (more or less permanent) diet of three feeding times a day. I am pretty sure she would violently attack any feeder, so I just want to know which ones are really really sturdy and which ones I am able to get because I live in the Netherlands and not many are available. I am considering to buy a Cat Mate product (either the C50 or the C3000) because that is almost the only available brand here in the Netherlands. Is this a good idea? Should I try to import another one for guaranteed success?
Hello Eva, thanks for your question. I think the Cat Mate C3000 will work OK for you if you manage to keep your cat away from the lid and the nozzle like this smart solutions from current customers. Smart cats can move the lid off and also get extra food from the nozzle with this feeder. And if you use small size pellet (1/4″ diameter size) make sure to setup the feeder in smaller amounts than you really need because the accuracy is not 100% with small pellets. If you do all this you should be fine with this feeder.
A second suggestion is somehow to get the Super Feeder which is more reliable, accurate and it works better with small round pellets. The advantage of this unit is that you can connect it to a home automation system for a better control of the unit being away from home and you can also mount this feeder into a wall to keep your cat from reaching the food. You can see examples of this on my Super Feeder Review.
I hope I could help you, and good luck!
PS: I forgot to mention if you buy the Cat Mate C3000 you have to buy the voltage converter for Europe. If you decide to buy the Super Feeder, do not buy it online, contact directly the supplier and they will tell you how to proceed. Here you can find more information about that http://www.super-feeder.com/qanda.html
Hi,
Nice website! I am currently looking into automatic feed systems, and I think I prefer one that is accessible through an app.
I was wondering what you think of the feed&go and the Petnet SmartFeeder.
I have not made reviews of those automatic feeders yet but I will keep them in mind for a review to help our readers. Thanks for the collaboration.
Hi,
I am looking for a feeder for my two cats. I live in Canada and I was wondering you have any recommendations for Canadians buying. I don’t have an issue ordering from the USA but I don’t want to have to dish out extra money for duties and such at customs. I have been considers the Pet Feedster and the Perfect Petfeeder.
Hi Amanda, thanks for your question. There is a page on Amazon explaining the shipping cost buying items from Canada.
Also, I have to mention that you made a good choice with the Petfeedster. There is a special new version for cats, you may want to check it out.
Good luck!
What product would you recommend for a cat that is awakening it’s owner every morning at 6am crying to be fed? She is fed twice a day, in the morning and in the evening. Thanks for help.
Hello James, if you want your cat to eat a healthy amount of food daily, let’s say 1/2 or 3/4 cup by day, you have to buy an automatic feeder with the ability to dispense this amount of food by day distributed in more than 2 meals by day. This way your cat will be able to eat more than 2 times a day, adding the 3rd meal at 6 am without exceeding the recommended intake for an adult cat. The other feature you need to look for is the ability to customize the meal-times you want to set for your cat.
Automatic feeders that accomplish this are: Pet Feedster, Super Feeder, Ergo Pet Feeder. Another alternative is the dish shaped Petsafe 5 Meal. These automatic feeders are reliable and the best in the market. Good luck James!
Hi – I wonder if you can help. I have two quite sick cats who are on a strict raw food diet (wet only). One is food focused and will push the other out of the way to eat her food also.
I need to find a way to feed them when I am stuck late at work. I am based in London, UK.
I looked at buying two of the wireless whiskers but that is dry food only and not available in the UK anyway.
Any thoughts?
Hi Wendy, I don’t see in the UK automatic wet food feeders what work with tags but you can create a special feeding station with microchip flap for the cat that does not get to eat. You can see my post about it.
This is a very good solution because it’ll completely stop the cat from stealing the other cat food. Good luck!
LOVE your site. THANK you for doing this.
I’m searching for one to feed two elderly cats wet food. I don’t want plastic bowls. Ideally, it would be programmable and/or have a motion sensor, would have glass, ceramic, or stainless dishes, and could take an ice pack. Message-recording is a nice feature, but lower on my list. (btw, If it runs on a battery and I did go away, I’d set up a kittycam to be sure it kept working, and call in an emergency human if it failed.)
Can you help?
Hi Sarah, with the requirements you ask so far there is one model, the Wonder Bowl, I have not made a review of this product yet but you can see details of this automatic feeder here. It has infrared technology to detect each cat and an insert stainless steel bowl. It has low battery indicator as well, but it does not have ice pack.
Another choice is the Petsafe 5 Meal which does not have ice pack underneath but current customers have found good ideas how to use it to keep the wet food fresh and also ideas for cats with allergy to plastic. You can see more details of this in my review.
Good luck!
Thank you so much! I’ll check them out!
I have a question about feeding my cat. With all the stir about wet and dry food, I recently started to give my cat both. She is 13 years old, 17 lbs. female. I have been feeding her a 1/4 cup of dry kibble in the a.m. and 1.5 oz. of canned food in the evening. I switched to diet kibble in the feeder (a.m.) but it hasn’t began to dispense as of yet. She has arthritis in her front legs I know from the weight. I don’t want to make her sick by not feeding her enough and also not make her sick by feeding her to little. Thank you so much for your help and LOVE your site!!!
Thank you!
Jamie and T. <<<< the cat :)
In 2 days she lost 3 ounces. Wow that kinda scares me. I know its a good diet but I think to much toooo fast! I added 1.5 oz wet food in the a.m. with the 1/4 kibble and 1.5 oz wet food in the evening.
Thank you :)
Hello Jamie, a rapid weight loss could be dangerous for a cat. A good rate for a cat to lose weight is about 1-2% of its body weight per week. When cats lose weight too fast is highly likely the weight will come back once the diet is over. Also, some cats could experience liver disease and even failure due to hepatic lipidosis. My suggestion is you to register your cat weight loss in a week and check if this fits in that rate.
My best recommendation is taking your cat to the Vet and make a diet plan with him for your cat to lose weight safely.
I am happy you like my site :-) thank you for your visit. Good luck!
My cat is very mean :( She hisses and spits and gets mad!!! She will even bite me when others are around. She is fine with me as long as no one else is near us :(She doesn’t like anyone other than me. The Vet is scared of her (even have a mobile vet) and she has the option to be put her to sleep but, at age 13 the vet does not want to do that. I discussed a plan with the vet a while back and she told me to start at 1/2 cup of Kibble a day.:( My Vet will visit and see her on occasion but she always gives me a discount because she can never perform a full test on her :( Your site is great and I love that you reply to us :)
Big hugs :)
Jamie and T.
I figured up 1% and I am a bit confused. She weights 16.7 if I take that times 1% I get 0.167 is that ounces?
That would equal 16 ounces? Which would equal a pound? Thanks so sorry to be a bug!
Jamie and T.
Hello Jamie, you can extract that percent from your cat’s current weight so you go: 16.7/1.01=16.53 this will make your cat lose 2.72 ounces by week (0.17 pounds). If this seems to little for you, you can go up to 2% in which case you go: 16.7/1.02=16.37 and this way your cat will lose 5.28 ounces by week (0.33 pounds). This is a safe and healthy rate for your cat to lose weight, especially considering she is old and has arthritis. Hope I could help you and good luck Jamie :-)
Wow my other bad subject math :) lol! How do you get
2.72 out of 16.53? I was good with the 1.01 then I got lost. Is there something I am missing. Sorry! Thank you so much :)
Hi Jamie, you go 16.70-16.53 and the difference in pounds (0.17) go to a converter to ounces and you will get the 2.72 ounces. It is the way I did it since I am more used to kilos lol! Good luck!
I was just about to order the Pet Feedster online, but it’s out of stock! Is there another feeder of similar quality (specifically portion control – I’d love to feed very small portions throughout the day), that also has the battery back up? I live in an area where the power goes out frequently when it rains. I’m very surprised the CSF models don’t have this option…
FYI – I currently have a Le Bistro which worked OK for a couple years (except that the portion control was not great), and now my cat is obsessively beating it to get extra food out. But I really like the battery option so I don’t have to worry about the power going out and disrupting the food supply.
Hello Lesley, the only automatic feeder that is able to work with both AC adapter and batteries at the same time is the Pet Feedster. This automatic feeder will be available on the end of June I understand.
The Super Feeder is an excellent automatic feeder too and if you experience constant power outages the Super Feeder is able to dispense normally as soon as the power is restored and that is why it is a good idea to program the Super Feeder with several small meals by day, up to 8.
If the power outages you experience in your area last a long time (more than 10 hours) I suggest you to wait for the Pet Feedster.
Thank you for your reply Lorena. I think we’ll wait for the Feedster just to be safe… but good to know about the Super Feeder.
No problem Lesley, if you have any other question don’t hesitate to visit me. Glad to help you. :-)
Hi,
I was looking for a feeder for my son’s cat so I’ll get to see him more often. His cat always eats until the bowl is empty so they have to spread her feedings out during the day. I have sent them this link so they can choose for themselves. Thank you!
One question I had though was about kibble shape. All my life the dry food we’ve fed was shaped like stars, fish, triangles, Xs and so on. Yet your reviews talk about a round size, 1/4 or 1/2 inch. What do you recommend for dry food of various shapes and sizes?
Gina
Hello Gina, for stars, fish or triangles shaped food I recommend automatic feeders that don’t use screw systems to push the food out because they get stuck most of the times.
The Super Feeder has a different system so it does not get stuck and works with any size or shape of food. I recommend round 1/4″ diameter size food because the Super Feeder gets a better accuracy when dispensing with that size and shape. If using a different shape or size with the Super Feeder you simply have to program it through trial and error method till getting the exact amount needed. All sophisticated automatic feeders work like that because you don’ program them by cups or ounces, but by the time of the feeder releasing, for example, 1 minute of the feeder dispensing is equal to one cup of dry food.
For any question don’t hesitate to ask me. Thanks for your input :-)
Hi,
I have three cats who roam fields all day and don’t wear collars due to always loosing them and coming home with scratches on them, (there fine now), but is there a food bowl on the market which opens without having to use a sensor on their collar or timed at set parts of the day, as they come in and out when they please and I need to stop those horrible flies from getting into their feed bowls as one cat only likes to eat meaty jelly cat food,
Katie
Hello Katie, I haven’t made a review of a product like that yet. I think all automatic cat feeders that cover completely the food have some automatic system to open. However, some time ago a follower of mine from England asked me about a feeder she knew it was sold in Italy and could not find the website. After a good researching I found the website and sent it to her. I think this feeder is distributed only in Europe so it’s sold in euros. The page it is in Italian but you can use a translator. In my opinion this is a good solution for what you need. Here’s the link. Maybe you can send them an email and ask. Good luck!
Update: Hi again Katie! I came across to a new feeder with a system to open and close as the pet gets close to the unit. The brand is Sharper Image. I have not made a review yet, but you can take a look to this unit and see if you like it. You can see a customer’s video how it works here.
I bought the CSF-3 Superfeeder–it works great! I plugged it in with my Lowe’s Iris WiFi kit and I can now feed my cats dry food from anywhere in the world via WiFi or smartphone app. This is by far the BEST option on the market for dry cat food period.
I have been trying to find a suitable feeder for canned cat food. Though I have not bought it yet, I did find a thermoelectrically cooled one from Germany called “Catsomat”.
Perhaps you can review it someday. Thanks for your informative site.
Dean
I am happy you have had a great experience with the Super Feeder, Dean. About Catsomat I checked it and it seems like a great device though, very expensive ($520). I will do a review of this device soon.
I am trying to find an automatic feeder for wet cat food that my 12 lb cat can’t outsmart. Needs to handle at least 4 meals so that it only has to be filled daily. What is the best one you can recommend?
Hello Forest, wet cat food feeders generally are subject to be outsmarted by cats because they contain food with fresh and strong meat odor that is irresistible to cats. To me, a good option is the Petsafe 5-meal electronic pet feeder (though it does not have ice pack) because it has a digital timer which gives more accurate feeding times, it is sturdier than other wet food feeders and trays have a good capacity. The “Con” of this feeder is that it does not have ice pack underneath the trays but what customers have done is to freeze wet cat food cans and place them in the trays only spreading the first meal and this way they take longer to thaw and they last fresh longer as well, for about 10 hours. If your cat is too smart and tries to get food from the first covered tray, you can place the food in the second tray but this way your cat will have only 3 meals daily. Good luck!
Thanks. I’ve ordered one for a try. Your idea about freezing the food is especially good. Will let you (and others) know how this works out.
Cool! don’t forget to let me know. Good luck!
my cat easily worked out how to put his paw under the lid of the c20 catmate feeder and pop the lid so i would not recommend that model! Im in market for the sturdiest one around now too!!!
Hi Sale, the CatMate C20 is subject to be opened by smart cats that are very determined to get extra food. It works much better with docile cats. Thanks for sharing your experience.
I have a very food obsessed cat that we feed twice daily right now. It works well except for the fact that my cat likes to get us up at 4:00 or 4:30 to eat then again at 5:30-6:30. We have quelled his inner beast by getting up twice and giving him about a teaspoon of food for the “second” morning feeding. He does not do this at night though! I need a feeder that I can program to feed at about 4:30, then again at about 5:30 and then the pm feeding as well about 12 hours later. Is there a feeder that allows timer to be set to dispenser different amounts at varied times? Thank you
Hello MaryG, there are various good automatic cat feeders that allow you to program meal times at different intervals. A very good automatic feeder is the Super Feeder with digital timer, that allows you to program whenever you need to feed your cat 24/7 and one week in advance if you want. The feeder can be programmed to release minimum amounts of foods, as little as a tablespoon to cups of food at a time. You can see a review the Super Feeder here.
Looking for a OUTDOOR automated cat feeder, will be in area protected from weather but is still cold…. Also have other wild animals attracted to area… Needs to be large hopper, 1 cat, very sturdy…
Hi Heidi, the Super Feeder is sturdy, well protected because it is all assembled by screws and it comes with an extra hopper as accessory. The hopper can be mounted high to protect the food from animals. You can check my review and take a look to pictures from customers who set the Super Feeder outdoors.
Thank you for your great information, and firstly i am sorry for my bad english. (I am Asian, so English is not comfortable. Please understand it..)
Anyway, I am cat’s father, and he is 1 year old.
He got a problem about his stomach, so I right down here for your help.
He got really sensitive stomach.
I tested many cat foods very very very carefully,
but he got almost diarrhea but one(royalcanin gastro).
I wanna give my cat it(gastro royal canin) forever, but pet doctor don’t reccomend it.(beacuse of not good stuff)
So, I ask you respectly..
Could you recommend some kinds of cat food?
here is..
—my cat’s poo history—
(Orijen, pure vita, go natural, evo, california natural series, taste of wild, Nature’s Variety Instinct)
= got diarrhea.
(Natural Balance Greenpea, Royalcanin kitten, Nutro natural choice)
= He didn’t get diarrhea, but he got very very very soft feces.
(Royal canin GASTRO INTESTINAL)
= He got good poo.
Please advice me, and reccomend some kinds of cat food.
P.S.
When I gave him new foods, I always did it very very carefully. (Gastro Interstinal 90%, New foods 10%)
and Now I am giving him nutritional supplement. (lactobacillus, probiotics.. things like that…)
Please, Help me.
Hello Kim, I understand your cat has gastrointestinal disease and that’s why it has all these problems with food. I would love to help you but I am not a Vet and I am afraid any food I could mention would be bad for your kitty. My suggestion is if maybe you can work out some special food for your cat with your Vet? it may be costly but I think it’s the only way your friend will be healthy since he has some abnormality in its digestive system. I am sorry I could not help you more! Hugs!
Our cat had the same problem until we stated feeding him Blue Buffalo Basics limited ingredient food. It’s the only one we could find that we could use all the time, that he actually likes eating, and that didn’t give him diarrhea. But definitely check with your vet as well.
Hi Stephen, the Super Feeder is a very reliable automatic feeder and it can be used with stainless steel bowl.
We have a cat with an allergy to plastic. I haven’t been able to find an automatic feeder that keeps plastic away from the food. Any suggestions? I appreciate the help. :-)
Hi Stephen, the Super Feeder is a very reliable automatic feeder and it can be used with stainless steel bowl.
Stephen,
When I adopted my cat they said she had an allergy to plastic and I had t use glass bowls. Hopefully you can sub a glass bowl in for the Plastic/stainless steel. She did eventually seem to adjust out of that. She is 11 now though, and maybe her’s was not an actual allergy.
Both feeders the Super Feeder and the Cat Mate C3000 have removable bowls so you can place a glass bowl instead.
I wonder if you can help me cut to the chase of choosing a feeder. I have a gluten allergy and a little extra money to buy these feeders at the moment. Affordable cat, dog, and fish food all have wheat gluten spelled out plainly (which gluten sufferers prefer the clarity), or wheat barley or rye in some form or trace. Getting gluten free pet food(not the same as grain free guys! trust me, tried that road and suffered for it) is not a current option for me at this time or in the near future.
I live alone and need to feed dry food to two cats (1/3 cup each) and a dog (Boxer, 1 1/2 cups) twice a day and me not touch the food daily. My theory is to fill the feeder once a week or twice a month and then wash the gluten off of me (full shower) immediately (I will still get sick but not as bad and not near as often.)
What feeder do you suggest for less than $100 (preferably a lot less). I feed at home with electric available or batteries obtainable.
Hello Tonnie, I am sorry about your allergy, that must be hard. Regarding the automatic feeders I can give you ideas for your 2 cats. The Super Feeder 3XL Combo allows you to forget about filling the hopper often because it comes with a 1.5 Gallon extra hopper, making a total of 1.8 Gallon capacity of this feeder. This is a long time without the need of refilling the feeder, but I understand you have a budget so the other options are the Crown Majestic and the Cat Mate C3000. Some points to consider about the Crown Majestic is that you can feed your cats twice a day but with 12 hours apart between each meal and a total of 1/2 cup of food every day each cat, maybe a little more, depending on the kibble size. This feeder does not work with very small or flat kibble. The Crown Majestic has a 4.4 lbs capacity so it does not have very much capacity to make you fill the hopper only twice a month. The Cat Mate C3000 allows you to feed your cats up to 3 times a day from very little amount of kibble at a time (2 tbsp) up to cups a day. The capacity of this feeder is 6.5 lbs. Good luck Tonnie and take care!
Lorena, really big thanks for your wonderful review site! It helped me tremendously when I was struggling to find a suitable cat feeder. I had originally thought of one model, but based on your careful reviews, went to another model (Petsafe 5 Meal). It has proved to be a perfect match for me and my cat, I even purchased a second unit to the summer cottage.
Warm hugs and love from Finland,
Janne
Hi Janne! I am very happy to know I could help you with my reviews. I love helping people and this gives me more motivation to keep working hard in making more in-depth and reliable reviews! Hugs :-)
I am trying to decide to purchase either the Pet Feedster PF-10 Cat or the Pet Feedster Automatic Pet Feeder. I have decided on this brand, because we want the security of having a feeder that is electric with a battery back-up and because we want something reliable. My cat, Toby, was diagnosed with Inflammatory Bowel Disease and Pancreatitis and we have found out he has food allergies. Toby eats 5 times a day – 1/8 of a cup, at 3:00 A.M., 8:00 A.M., 12:00 P.M. 4:00 P.M. and 9:00 P.M., so we need a machine that is able to be programmed at these times and able to dispense an 1/8 of a cup. He eats Royal Canin Hypoallergenic Hydrolyzed Protein cat food. Can you please give me advice on which machine to purchase? Thank you for your help.
Hello Beth, the Pet Feedster (For pets and adapted for cats, both) dispenses from a tablespoon to cups of dry food at a time. It can dispense up to 5 times a day and it works with batteries and plugged (simultaneously). With the digital timer, you can program the meal times according to your cat’s needs. Good luck!
I am looking for a feeder with timer to suit my cat who eats too fast and regurgitates. Some of these look amazing, but can you tell me if they are available in Australia ?
Hello Anna! the Petsafe Healthy Pet Simply Feed has a special feature that is called “Slow Feed Mode” which prevents cats from inhaling the food. You can set the meal to be dispensed in 15 minutes range, which allows the food coming out slowly from the feeder. Unfortunately, I don’t know if they ship to Australia, I am sorry I could not help you with that.
Thank you for the reviews and for answering questions! I purchased 2 of the PetSafe 5 Meal Feeders 6 months ago for my two cats (who eat at the same time, but sharing bowls doesn’t work so well so I bought them each one feeder). It has been working out great. Except that I recently I realized one cat may be developing chin acne. I checked out the Sur La Table website and couldn’t find any stainless steel bowls that would fit into the feeder…and I’ve looked at many different stores and couldn’t find anything that would fit the right shape. Do you have any other ideas of where I could find another material of bowl to work with this feeder? Or ideas of other options? Thank you!
Hi Shaunga, this is the link. If you are going to buy the prep bowl online buy only one to make sure it fits perfectly, it should though since the shape has not changed. Good luck!
Hi there!
I feed my cat Royal Canin Urinary SO dry food. Is there another automatic timed feeder you would recommend that isn’t going to be 210$ like the Pet Feedster? I haven’t found anything to be honest and I’m really interested in getting something a little bit cheaper that won’t jam.
Thank you!!
I suggest you the Feed and Go, you can feed wet and dry food. You can program, control and feed your cat in real time through internet and see your cat eating through a built-in webcam. You can check a review of this unit here.
Hello there! I am due to go on holiday for a week and need to purchase a reliable feeder (or 3!) for my three cats. They are used to being fed morning (biscuits) and evening (wet food) and so I want something reliable for the morning rota that can be programmed for the time I am away, then a friend will do the evening duties. I am so scared they won’t get fed and I am a little baffled by the options out there! Can you help / recommend please? I’m based in the UK. Thank you.
Hello Amanda I recommend you the PetFeedster if you need a very reliable feeder. Good luck!
We are stumped. We have 2 16 yr old cats both with healthy weights. They are both microchipped and wear collars. They are indoor cats. They both have thrived on unlimited supplies of dry food with wet food served once a week. Nori has advancing kidney disease. She is now on Rx wet food and very limited Rx dry whereas Sake can continue on her regular diet. How do you recommend we feed them given that Nori will remain attracted to Sake’s dry food and Sake will likely want to eat Nori’s wet food and dry food. What feeder(s) would best solve our dilemma?
Hello Jane, I think your dilemma will be solved with 2 feeders rather than one. If getting 2 Surefeed microchip feeder you can feed both cats their different diet without each one eating the other’s food. SureFeed does not restrict intake so it would work perfectly for you.
Hi there,
I have a friend who has been feeding a feral cat on a mostly daily basis – the cat comes along once a day (but sometimes has a gap of a day or two) very early in the morning and is not seen for the rest of the day/night. My friend is going away at Christmas for a couple of weeks and does not have someone who can take over the feeding of the cat except perhaps once a week.
I am looking for an automatic food dispenser (or two) that she could start using now to get the cat familiar with the dispenser a few months in advance – the cat has wet and dry food so I was thinking of a wet dispenser and a dry dispenser that can be left outside and could run on batteries. It would need to dispense one meal a day for 5-7 days (at which point it would be replenished). I am not sure my friend would be able to ‘build’ something to protect or house the dispensers and I don’t believe there is any outside electricity.
Do you have any recommendations please or suggestions on the best ones to choose? (We are in the UK if that makes any difference.)
Maria
Hi Maria a very good option would be the Feed and Go but unfortunately this feeder does not run on batteries, only on AC plug. The good thing of this feeder is that you can control it throught your Smartphone, PC or Laptop. You can also see your pet when eating through a built-in webcam. This is an excellent feature if leaving the pet alone for 5 or more days. If you can find a way to plug the feeder and still leaving it outside it would be a good solution for you. Otherwise, the second best feeder that works on batteries and can be used with dry and wet food is the Petsafe 5-meal. Make sure to place frozen wet canned food in the trays before leaving it for some days. Make sure the first and second meal to be wet and then the rest dry food. Good luck.
Hey Lorena,
Great site! So informative.
We live in Canada and have two Bengals that LOVE their food. The problem is they wake us up at 4am for food. They don’t share well, but we were hoping there was one dispenser that fed two cats at the same time, with the same portions.
Please direct us in the right direction!
Angela
Hi Angela, thanks! I am happy you like my website! Regarding a good cat food dispenser to feed two cats I have two in mind: The PetFeedster and the Super Feeder. The PetFeedster has a tray big enough to feed two cats without any problem, but you say they don’t like to eat together so there is a fancy solution from a customer to use the PetFeedster with a toy dispenser. See this solution here. On the other hand, the Super Feeder can be adapted to feed two cats if you are handy enough. You can see my review of this feeder here where you will see a video how the Super Feeder was adapted to feed two cats, separately. Portions will have to be splited by gravity because it can’t be divided in two parts in one dispensing when feeding the cats at the same time. Hope that helps!
Love your site!
Thanks Ceresa!
Hi,
Loved the reviews but cannot find one that ships to Australia!!! Do you know of any that do or the best of the Australian ones?
Cheers
I know that Pet Feedster Company ships to Australia, just contact them!
Does anyone know of an automatic feeder that has a digital timer and two dishes side by side? I need to be able to feed my two cats simultaneously but they need a dish each, and most of the two tray feeders use separate mechanical timers that cannot be synchronised.
I emailed the Feed & Go people to suggest doing a two cat version. All they’d need to do is modify the lid so two compartments can be exposed at once, with a slight adjustment to the software to allow for this. Only trouble with that idea is that the first two meals are exposed immediately, and you only get two more mealtimes, but this would be better than nothing!
Any two cat solutions please?
Hello Stuart, do you want to feed your cats dry or wet food?
Hi Lorena,
Thanks for such an informative website! We originally purchased the Cat Mate C10 automatic feeder quite awhile ago, but our cat figured out how to get into it quite quickly. (despite our best efforts).
We need to feed her wet food, as we administer her medication by crushing the pills up in her food.
Which feeder (for wet food) would you recommend for a very smart, VERY food motivated cat?
Thank you so much for any help- it’s greatly appreciated!
Hello Lindsay! for wet food I recommend you the Feed and Go. It’s designed thinking of very smart and food motivated cats so they can’t break into the unit. The feeder doesn’t have ice packs but it has been tested with wet food during 3 days in 83 degrees heat and the food is OK after this period of time (the top seals almost airtight). For extra freshness you may want to place the wet food frozen and spread it on the slots. Check the full review of this feeder here.
Hi!
I adopted my cat who is over weight and likes to wake me in the wee hours of the morning like clockwork to get fed. So I’d also like to keep my sanity by not being woken so early before I have to get up for work.
My husband and I do travel a lot. And always seem to find someone to care for my cat for long periods. For weekend get aways we can manage leaving him alone for one night.
I’m wondering if any of the automatic pet feeders can dispense two different kinds of kibble. My vet recommended a Royal canin but I like something with less corn or wheat. So I also mix in another slightly smaller dry kibble to provide more protein.
Can any of the automatic feeders dispense two sizes of kibble without getting stuck or jamming?
Thanks!
Hello Lindsey! Fortunately there is a feeder that will dispense mix kibble without jamming! I actually feed my cat mix kibble and I use the PetFeedster to dispense a mix of Petcurean Go (small round kibble) and Fromm Game Bird (irregular shaped kibble). The PetFeedser dispenses this mix with no problem. One thing you need to consider is to adjust the Flex Feeder to the widest so it doesn’t jam. I travel a lot and this feeder hasn’t stopped dispensing because it has battery backup in case of a power outage. You can check a review with a video I made with the PetFeedster here. Hope that helps!
Hi there!
We have 3 cats, all of whom need to go on a reduced food diet, 1 much more than the other 2. 1 Cat is a food bully. They are not microchipped, and have never worn collars, but I don’t think it would be too difficult to introduce them. What would you recommend to ensure that each cat only gets their specified daily amount?
Hello Aerin, the SureFeed microchip cat feeder works good for cats.
Hi. I’m looking for a rugged, simple gravity feeder, that can be left unattended and filled once a week. I look after 5 wonderful feral cats at our company’s previous premises. We have relocated and nobody has yet moved into the old property, so the cats are left without anyone to care for them. I have been going daily to feed them, but last week, I was hijacked at gunpoint at the property as I was locking the gate (took my car, laptop, phone, wallet etc etc) so I am reluctant to go there as often as I was. I want a feeder (or a few) that I can fill once a week, and that will dispense food over the course of the week. Any ideas or suggestions would be most welcome. Many thanks. Rob
Hi Rob I am sorry to hear about that horrible experience you suffered. Regarding your question, gravity feeders are practical because you don’t need batteries or complicated systems for them to work, however most gravity feeders need a little shaking once in a while for the kibble to drop to the tray. This is due to the fact that the accumulated dry food inside the hopper needs a little help to keep dropping towards the tray unless you use very small round kibble. If a feeder has a large capacity the need of a “touch” to the hopper may be less often. The Bergan Elite feeder has a capacity of 13 lbs (not sure if enough food for 7 days with 5 cats though). Also, if the cats are smart enough they can help the feeder to release more food by sticking their paws inside the chute in which case it wouldn’t be necessary to shake the hopper.
I wish I could help with more ideas, thanks for taking care of those cats, I really thank you for that!! Take care.
Hi! I have two cats. We think one may be diabetic, and can only have wet food. He wakes me up in the middle of the night every night to be fed. I am looking for a selective feeder that can give him numerous small wet food meals timed throughout the day/night, but won’t allow the other cat to eat his special food. Is there anselective feeders that has the feature of being timed to feed multiple meals throughout the day? Thank you in advance!
Hi Chari! The SureFeed Microchip Pet feeder works with collar tag or a microchipped cat so only the authorized cat can eat from it. However, the feeder has a free feeding system without timer and you need timed meals. What I can suggest you is creating a feeding station using selective automatic cat door, you can check my article here. Hope that helps!